This article is also available in the following languages: Portuguese.
A few people have said in the past that the best way to learn something is by teaching others. So, here is my attempt to explain CSS and HTML languages in layperson terms, so absolute beginners can follow these steps in order to start a journey into the web development area. 🧑💻
In this article, we will be covering what does both CSS and HTML actually means, and how developers can build web pages using these languages. The logic behind it is similar to drawing. You wonder how? 🧑🎨
Introduction
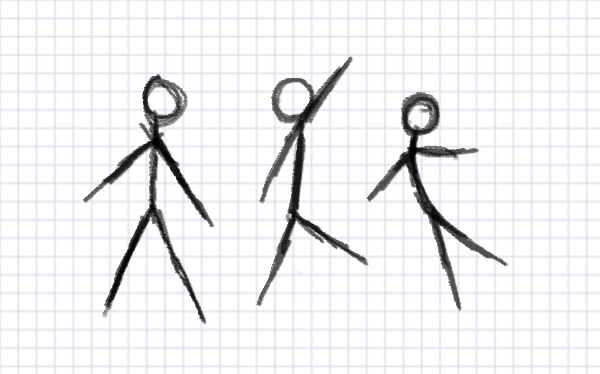
You are probably a better artist than I am, but I am sure you at least once started a drawing like this: at first, you draw a head, a very well-known circle one; and then, made a stick body, with upper and lower members coming out of it.
Your drawing probably looked like this:

Image by Monika Zagrobelna on “How to Draw a Stick Figure: a Complex Guide”
So, how does it relate to CSS and HTML? I am glad you ask!
If you want a web browser to know the structure, in order to render a web page, you must present it a structure.
HTML, and the page structure 🏋️
So here comes the HyperText Markup Language (or its acronym, the HTML): it tells the web browser where the elements are located, and how do they exist.
💡 As you noticed, by its definition, HTML is a markup language, not a programming language. It does not use any variables or functions, so we can’t make a full-functional application, nor interact directly with the elements on the page. To do this, we can use JavaScript or any other programming language.
By default, the most modern web browsers know how to render a paragraph, a button, or an input even if you don’t tell them how it should appear. It’s defined by the HTML Standard and by the vendor default CSS style-sheets in most browsers.
Actually, they don’t look all the same on every web browser. So, there are some plugins that help developers by making it look “normalized”, such as normalize.css.
Also, in the HTML, we can make the web browser to behavior in certain ways, by importing a few “libraries” (that can help developers, as they contain many functions, so they don’t have to write, or create, all that by themselves over and over again), and by containing some metadata, such as the title, the language, the viewport and the characters encoding standard (usually, developers use UTF-8, because it contains a lot of entities that we are used to reading in English).
Those libraries and metadata are too important in order to make the web browser render the page well, so we may want to load it before the web browser ends the rendering task. That’s why we usually call it at the head, just before the browser knows what are the elements or how do they look.
The elements, right after the head being loaded, are located in the body structure. And they can be nested, just like branches on a tree.
So, that’s the basic structure of the HTML, or the structure of a web page. A real-page may look like this:
<!DOCTYPE html>
<html lang="en-US">
    <head>
        <title>Here goes the Page's Title</title>
    </head>
    <body>
        <h1>This is a big heading</h1>
        <p>And this is a paragraph.</p>
    </body>
</html>
Notice how this markup language works: the elements, such as the title, the heading h1, and the paragraph (p) are expressed starting with <, and ending with />. Also, there are two elements “inside” the <html> one: the head, that contains the title element; and the body, where most of the elements are located, and displayed on web browser.
💡 Don’t worry if you don’t fully understand what this code does yet. We are just getting started, and if you reach this part, well done, you are really making progress! 👏
CSS, and the page look 💄
Now, let’s go back to our drawing. We sure can make it look more elegant, funny, or even sexy. So, let’s put some color into our character-friend.
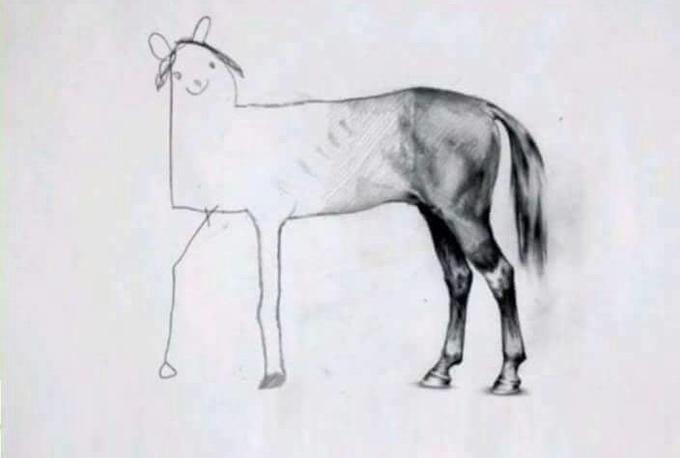
We can change how do the elements, or how the whole page, looks, as we can put some colors and effects into our drawing. To illustrate that, we can turn our design into a completely different and professional look, like the “Unfinished Horse Drawing” that you are probably familiar with it:

“Unfinished Horse Drawing”, by Ali Bati, on Know Your Meme
That’s the magic of the CSS, or the Cascading Style Sheets: it tells the web browser how these elements, and the web page’s structure, should look, in order to make it successfully rendered.
By tweaking our CSS file — you can include it on the head, or on the body as well, in our HTML file, depending on when we want it to load by the browser —, the changes will apply whenever we open the page, or right after all the elements are rendered.
CSS can make changes to the structure as well. It can contain rules to create columns or rows for the elements to show, for example. Also, CSS can rule the elements’ positions related to each other on the three-dimensional space(!).
You probably familiar with the X, Y and Z axis, right? In the CSS file, we can change the position and the scale of the elements, but also the z-index, that tells the order of the elements related to each other: elements with lower values are positioned backwards, and higher values, on the front, just like a 3D image.
A simple CSS file may look like this:
body {
    background-color: black;
}
h1 {
    color: blue;
    font-size: 32px;
}
The Cascading Style-Sheet syntax is different from the previous markup language: the elements are identified by their selector, such as the h1 there; then followed by a property and its value, like the color: blue; in our example; the declarations containing property and values are typed inside the { and } characters.
There are lots of great tutorials on how to create good-looking web pages, templates, and design trends for free on the internet — you can check it later, using the #web-development, #design and #css tags, for example.
Recap 🧩
We’re done, so let’s recap. We went through the basics on HTML, and learned about the head and body structure, that contains the elements and tell the browser how to render the page correctly. We also covered the basics on CSS, that is capable of changing the web page’s look and feel, and how the elements appear before and after the page is successfully loaded.
Conclusion 🎉
The HTML5 and CSS3 (the current and latest versions of each one) can be used to create animations, patterns, and even interactive games. Browsers are also becoming much more smart, as developers are creating new tools and technical specifications in order to solve many problems nowadays.
The UI (User Interface) and the UX (User Experience) are crafting new ways to use those style-sheets and structures too, by making things beautiful and useful interfaces to us, the web users.
Next steps 🚶♂️
Now that we understand the basics on CSS and HTML, let me invite you to follow this series, so we can go even further on learning about web development. On the next article, we will be covering how to build a web page from scratch using these languages.
What do you think could be the next big thing developers may create on the upcoming new versions, like the HTML6 or CSS4? And, what kind of design do you want to achieve on the next steps? Tell us in the comments. 📢
References
[1] “CSS: Cascading Style Sheets”, from MDN Web Docs: https://developer.mozilla.org/en-US/docs/Web/CSS.
[2] “CSS Introduction”, from W3Schools: https://www.w3schools.com/css/css_intro.asp.
[3] “HTML: HyperText Markup Language”, from MDN Web Docs: https://developer.mozilla.org/en-US/docs/Web/HTML.
[4] “HTML Standard”, from WHATWG community: https://html.spec.whatwg.org/.

